Generating a CSV
You can export the analyzed content into CSV format. The CSV file contains all the raw data that can be used as a base for generating PDF reports.
To generate a CSV file
- Perform one of the following steps:
- Click Generate report icon on the Home menu.
- Go to the File menu > Generate report.
- Press F10.
The "Generate report" window is displayed.
- Click Generate report icon on the Home menu.
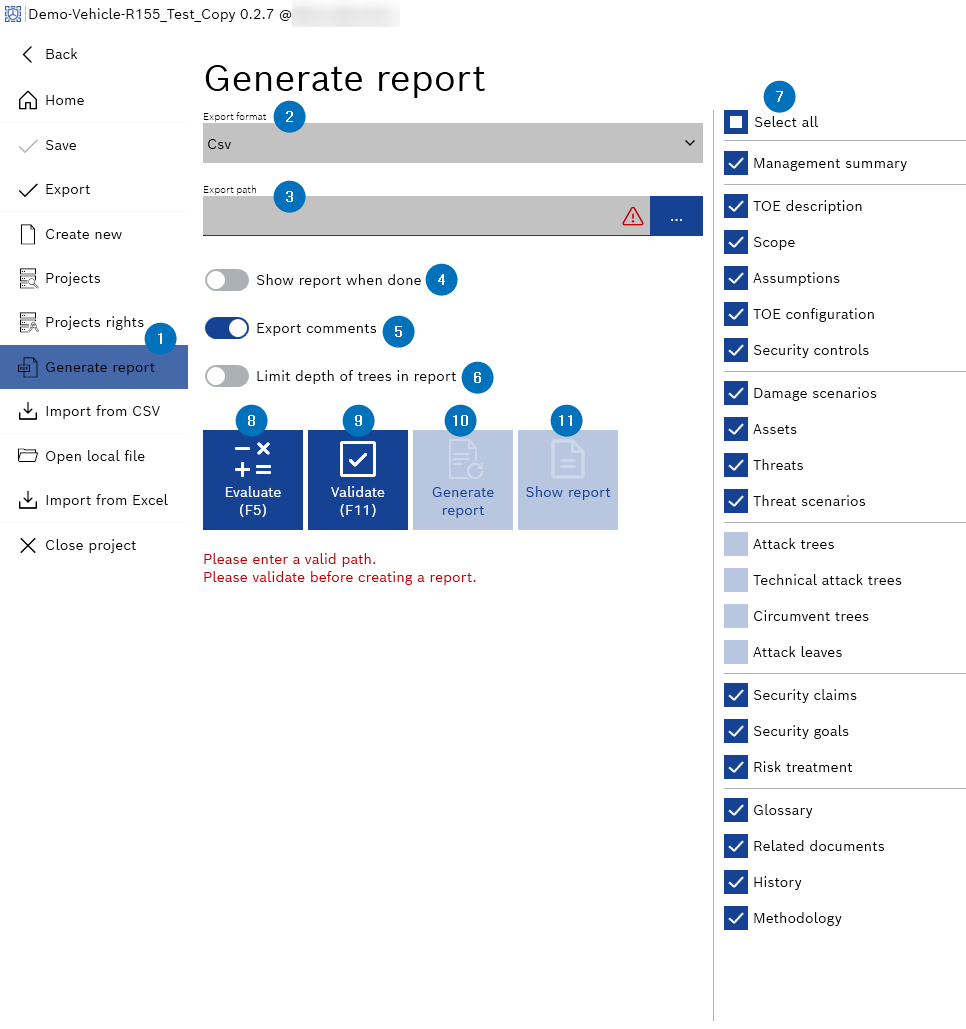
- Select Csv from the "Export format" drop-down menu.
- Enter the export path in the "Export path" field or click ... to browse and select it.
- Decide whether you want to show the report when done with the "Show report when done" toggle button. This step is optional.
- Decide whether you want to export comments with the "Export comments" toggle button. This step is optional.
- Decide whether you want to limit depth of trees in report with the "Limit depth of trees in report" toggle button. This step is optional.
- Activate or deactivate the check boxes to configure the information to include in the report.
|
Note |
|---|
|
You must evaluate and validate the project before generating a CSV report. |
- Click Evaluate.
The report is evaluated, and the "Generate report" option is enabled.
- Click Validate. It is not mandatory to solve errors and warnings when generating a report. This step is optional.
The report is validated.
- Click Generate report.
The report is successfully generated.
- Click Show report, if the "Show report when done" toggle button is not activated in Step 4.
- The report is displayed.